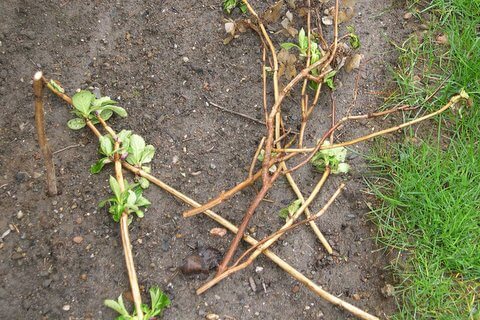
From this pathetic little bunch of twigs, given a few years, I will have a couple of nice rows of hydrangeas. I grabbed the handful of trimmings out of the compost pile when helping my mom in her yard this spring.

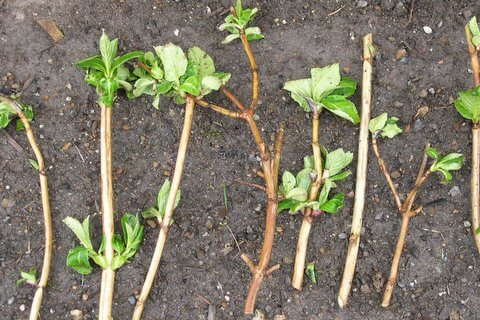
The second photo shows the same bunch, this time prepared into ready to plant “cuttings”. I don’t profess to be an authority on this subject, but I sure have come up with a yard full of free plants using my method.
I start by looking at the branch I have rescued, and determining where the buds are forming, or where the leaves are located. I cut on the diagonal and try to make it so each “cutting” has one of the bud intersections for the root and one above ground for the beginning of my new plant.
If I’m working with a branch that has large leaves, I cut the 2 leaves that will be above ground in half, so the little start doesn’t have to work so hard on leaves, but it can concentrate on putting out some new roots.
In the past, I have gone to the trouble (& expense) of trying a rooting hormone to dip the ends in, but haven’t noticed any difference in my starts. Both end up with a nice plant; one for free and one using a fairly expensive product. No guesswork needed as to which method I prefer!

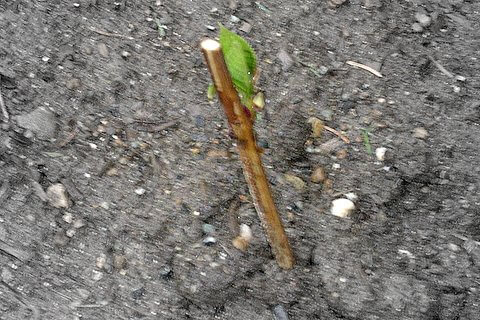
The last photo shows one of my new starts in the ground – they were there less than a week at the time of the picture. New leaves are beginning to unfurl which is a promise of a new garden addition (you must remember that “free” gardening often requires patience as the reward does not come as quickly this way as with buying plants that are already mature).
I have used this technique on many woody, branch type shrubs and plants such as forsythia, laurel, etc. If the method is free, what have you got to lose?

Steph Coelho is a freelance writer gardening in zone 5b. She is a certified Square Foot Gardener and has taught various garden-related workshops. When she’s not digging in the dirt or writing, she’s cooking up fresh produce, running, or listening to her favorite podcasts.
Leave a Reply