Cheap and Economical Humidity Dome Alternatives

Cheap and Economical Humidity Dome Alternatives

If you grow your plants from seeds then you probably know what a humidity dome is. (If not, don’t worry, we’ll go over it briefly below.) Just like with all of your other gardening supplies, you can buy humidity domes from a variety of different sources. However, you can also DIY them. Here are some cheap and economical humidity dome alternatives.

What Is a Humidity Dome?

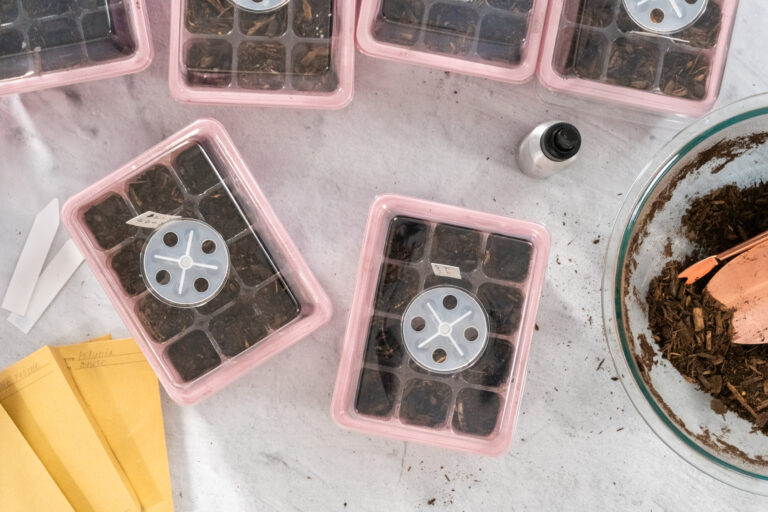
A humidity dome sounds like a really fancy device, doesn’t it? Bootstrap Farmer says that they’re an important part of your seed starting tool kit. But what are they? Basically, they’re just plastic lids for your seed trays. Very important, very helpful, but not necessarily fancy at all.

Why Use a Humidity Dome For Seed Starting?

Humidity domes help retain moisture in the soil. Instead of evaporating into the air, the plastic lid catches the moisture and keeps it there with the seeds. Additionally, the lid helps maintain an even temperature for the seeds in the tray. Benefits of using a humidity dome include:

  • Less time spent watering
  • Less time spent checking and maintaining temperature
  • Improved germination rates
  • Faster germination
  • Protection for delicate, expensive, favorite seeds

Are they necessary? Some say yes, and some say no. But as long as you can find cheap and economical humidity dome alternatives then there’s really no harm in at least seeing if they improve your seed-growing process.

Cheap and Economical Humidity Dome Alternatives

So, you can obviously shop around and purchase a variety of humidity domes for your gardening. You can also purchase seed trays that come with their own domes. But you can also come up with your own cheap and economical humidity dome alternatives. For example, alternatives offered in a National Gardening Association forum and over on the Green Upside website include:

Living Lettuce Containers

Obviously, these are already designed to grow plants – you buy them with lettuce growing inside. When you’re done with the lettuce, use the container. It’s roomy, about the same width as height, and it’s a great option for starting your seeds in at home.

Plastic Wrap

Green Upside explains that you can use plastic wrap around an egg carton seed starting tray or almost any other container to create the humidity dome.

Plastic Bag

Alternatively, you can use a plastic bag the same way. Specifically, Green Upside notes that you can use a wet paper towel inside of a plastic bag to start your seeds … no other containers are needed!

Ready-To-Eat Chicken Containers

You know those chickens that you buy whole, ready-to-eat, from Costco or the supermarket? They usually come on a plastic tray with a plastic dome over it. If you’re a gardener, you might look at that container and think, “That would be perfect for my garden.” If you have plants that need room for leaves to grow, these can be great humidity dome alternatives.

Plastic Bottle

Cut the bottom out of a large plastic bottle, such as a gallon milk bottle. Use that as your humidity dome over your seed tray.

Plastic Containers for Berries

These are an interesting choice. They’re shallow, so you have to choose what you’re growing in there carefully. Moreover, they’re vented with air holes. Sometimes this is a good thing and sometimes it defeats the purpose of your humidity dome. Sometimes too much humidity leads to mold so the venting is good. It depends on varied factors. So, consider this a potential option, but it may not be the best one.

Old Food Containers

Do you have a bunch of food containers that you keep to store your leftovers? Do you have too many of them? Green Upside suggests using any food container with a lid to create your seed tray with its own humidity dome.

In other words, look around for plastic that you can recycle/upcycle to create a humidity home!

Read More:


DIY Squash Trellis Under $10


DIY squash trellis under $10

Growing squash is a great idea. There are many great squash varieties to feed your family. However, you want to plan ahead when growing squash. If you don’t, then this plant can take over your entire garden. In particular, you’ll want to train your squash to grow on a trellis. Here are some great ideas for how to make a DIY squash trellis under $10 or you can also use Craftcamp DIY plans for DIY privacy trellis.

Why You Need a Squash Trellis

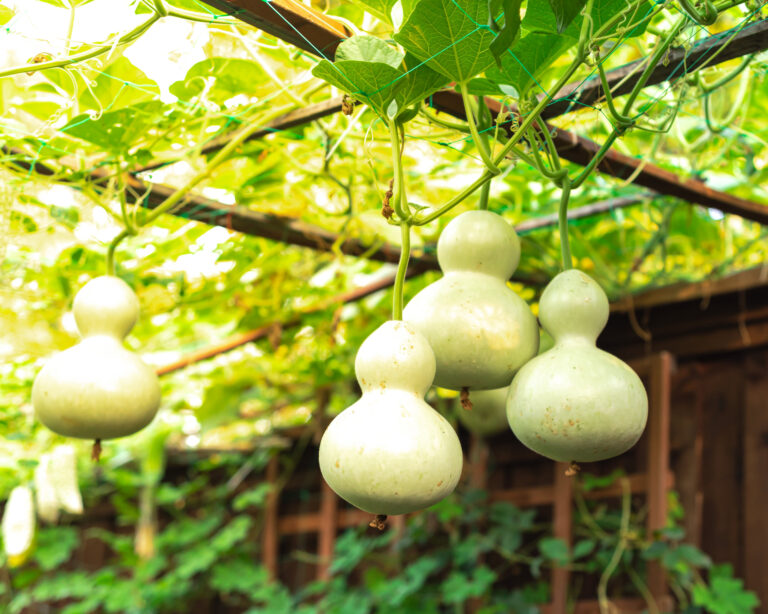
Rural Sprout explains that squash will absolutely overrun a garden if you plant this vegetable without a trellis. Like an octopus, they’ll reach their tentacles all over the place. This can wreak havoc on your other plants. Therefore, you want to use a squash trellis. You can train the squash to grow up a vertical trellis. According to Rural Sprout, the benefits of vertical gardening for squash plants include:

  • Saves space, allowing for more squash growth while retaining space to grow other plants
  • Keeps squash fruit off of the ground, improving the fruit and the plants as a whole (yes, squash is a fruit)
  • It’s easier to harvest squash grown vertically on a trellis
  • The vertical design gives you opportunities for enhancing your garden’s aesthetic design

Squash To Grow on a Trellis

There are many different types of squash that you can grow in your backyard garden. Gardening Know How says that some of the best squash for vertical gardening include acorn squash, delicata, yellow summer squash and zucchini. You can grow other squash vertically but the heavier varieties will require stronger trellis reinforcement.

How to DIY Squash Trellis Under $10

You can purchase a squash trellis. However, frugal gardeners can easily make a DIY squash trellis under $10. Here are some great examples of how to do so:

Put some basic woodworking skills to the test to create this DIY Squash Trellis under $10. As you can see, you’ll make some simple cuts in your wood. You’ll actually use 10 1x2x96 furring strips, which cost less than $1 each at most home improvement stores. Assemble the smaller and larger pieces as shown in the video, propping them up together to create the squash trellis. As long as you already have the saw and drill, this is a very affordable project.HJ

Here’s another great example of how to DIY a squash trellis. In this example, you buy 5′ stakes designed for growing tomatoes and other plants. You attach them to the planter at an angle so that the squash (or in this example, the cucumbers) can grow upwards at that angle. Then you build out the frame to create a fuller trellis. You add wires horizontally within the frame. The vine tendrils from your squash will climb those wires. This is another super simple project under $10.

Tips For Growing Squash

Here are some additional tips for vertical squash gardening:

  • You can adapt these DIY ideas to any wood or fencing that you already have at home. It’s great to repurpose those items.
  • Secure your vertical trellis posts deep in the ground. You want the bottom of the trellis to be able to bear a lot of vertical weight as the squash plants grow.
  • Make sure that your plants get plenty of sunlight.
  • Train the plants to grow where you want them to by guiding the vines onto the trellis wires as they grow.
  • For heavier squash plants, either grow them on the ground or add slings to support the squash as they grow. Otherwise they can break off at the stems. Watch as they grow in size to get a sense of whether or not you’ll need this additional support.

Read More:


17 Gardening Tips for Seniors to Create the Perfect Backyard Oasis

Ah, retirement! The golden years when you finally have time to turn that neglected backyard into your own slice of paradise. But before you start, remember that gardening is supposed to be fun! Whether you’re a seasoned green thumb or a novice nurturing your first petunia, these 17 gardening tips are your secret sauce to creating the perfect backyard oasis.

1. Ergonomic Tools

One of the best investments you can make as a gardener is to go for ergonomic tools. They help you create the garden of your dreams with style and far less pain! Look for tools with padded handles and easy-to-use mechanisms that don’t require a wrestling match to operate. They’re great for your back and knees!

2. Raised Beds

Why stoop when you can stand? Raised beds not only save your spine but also provide excellent drainage for your plants. Plus, they’re like a buffet for your plants by giving them the best soil conditions on a silver platter. Throw in the fact that these elevated wonders are a fortress against those ground-creeping critters, and you’ve got yourself a win-win situation!

3. Drip Irrigation

Forget about standing with a hose – drip irrigation delivers water directly to your plants’ roots. It’s efficient, conserves water, and gives you more time to enjoy your garden instead of tending to it. Why wouldn’t you like it? Just imagine sipping lemonade on your porch while your garden hydrates itself – that’s the good life.

4. Mulch

Mulch isn’t just pretty – it’s a garden’s secret armor against weeds. A nice, thick layer keeps those pesky plant invaders at bay and retains moisture. Plus, it makes your garden beds look tidy and well-dressed. It’s also a mini spa for your soil that keeps it cool and cozy during those scorching summer days.

5. Perennials

Perennials are the gift that keeps on giving, year after year. They’re like the reliable old friends you can count on to brighten your garden with minimal fuss. Choose varieties that thrive in your climate for an effortless splash of color. And, let’s be honest, seeing them come back is pretty darn rewarding!

6. Container Gardening

No space? No problem! Containers are the ultimate gardening tool because they’ll give you both flexibility and creativity. They’re also easier to manage and can be moved to suit your whims or the sun’s mood swings. If you deck out your patio with pots of all sizes, then you’ll have yourself a movable feast of greenery!

7. Native Plants

Sticking to native plants in your garden ensures that you’re working with flora that naturally excels in your environment. These plants have acclimated to local weather patterns and soil types, demanding less water and work from you. Why wouldn’t you want to make things much simpler?

8. Mastering Composting

Master the art of composting and watch as your kitchen scraps and yard waste morph into a nutrient-packed feast for your plants. Yes, it reduces waste, but it also empowers your garden to flourish. It’s almost magical, turning everyday leftovers into a valuable resource to help your plants grow.

9. Growing Easy Vegetables

You should always go for vegetables that promise ease and abundance. Favorites like tomatoes, lettuce, and radishes don’t ask for much, yet you can always be sure of their rewards. There’s nothing better than seeing your vegetables go from garden to table in no time at all. It’s the best way to celebrate the pure taste of home-grown freshness.

10. Mobility Aids

Garden scooters, kneelers, and rolling benches completely change how we engage with our gardens. These innovative tools will banish post-gardening soreness, meaning you can nurture your green spaces without discomfort. This way, every moment you spend in your garden is one of joy rather than of recovery.

11. Automatic Garden Care

Imagine a garden that tends to itself. Sounds like a dream, right? Timers, solar-powered lights, and robotic lawnmowers work together to keep your garden thriving with a minimal amount of work. You’ll be able to soak in the pleasure of your outdoor sanctuary or explore new hobbies, all while your garden flourishes by itself!

12. Welcoming Wildlife

Transform your garden into a community center for birds, bees, and butterflies. If you use bird feeders and plenty of water sources, you’ll help to create a living sanctuary that’ll support the ecosystem. It’ll also bring the thrill of wildlife observation to your doorstep. Make the beauty of nature part of your daily life!

13. A Year-Round Garden Parade

Just imagine a garden that looks beautiful in every season. Choosing plants that shine at different times of the year means you’ll have an endless display of color and life. Planning carefully like this will mean your garden continually evolves, giving you a fresh face with each passing season.

14. Low-Maintenance Greenery

You should definitely go for low-maintenance plants like shrubs, and ground covers that flourish on their own. These will transform your garden into a green heaven that doesn’t require constant care. You’ll be able to enjoy nature in all its wonder without the need for constant upkeep! 

15. Enchanting Pathway

Design paths in your garden that lead to adventures. Whether you’re laying down whimsical wood chips or sophisticated flagstones, each path tells a story through your garden. Pathways become the center of your yard, telling tales of flora and inviting visitors to uncover its secrets step by step.

16. Garden of Lights

When twilight descends, your garden will truly come alive, all thanks to how you use the lighting. Go for lights that truly brighten up your pathways and accent your favorite features. This way, you can create an oasis of calm for evening escapism. These lights will turn every evening into an opportunity to experience your garden in a new, mystical light.

17. Gardening Clubs

One of the best things you can do is to join a gardening club. Being alongside all these other green-thumbed individuals, every conversation will give you seeds of knowledge and friendship. It’s here where garden dreams and personal aspirations come together, watered by collective passion and blooming into something truly magnificent.

Smart Choices 

Transforming your backyard into an oasis doesn’t need a magic wand or a youth potion. It’s all about smart choices, from ergonomic tools that won’t leave you sore to choosing plants that pretty much take care of themselves. If you follow these 17 tips, you’ll create a vibrant, thriving garden for everyone!


Frugal Ways To Clean and Disinfect Your Garden Tools

Clean and Disinfect Your Garden Tools

It’s spring and for many of us that’s a great reminder to do some spring cleaning. Cleaning isn’t just for the house, either; you should spring clean your garden. And, of course, you should clean and disinfect your garden tools throughout the year as well. Here are some of the most frugal ways that you can do that,.

Difference Between Cleaning and Disinfecting Garden Tools

Last year, we looked at five frugal ways to disinfect garden tools. We’re going to talk more about disinfecting but also about cleaning. So what is the difference between when you clean and disinfect garden tools?

The two things are related, of course. But cleaning gardening tools simply means washing off the soil and whatever else might be visible on the tools. This is something that you should doing regularly. It helps keep them in good working order, preventing rust and other damage. It also helps prevent the spread of disease or other garden problems if you’re using the same tools throughout the garden.

Cleaning is also something you might do before disinfecting your garden tools. Disinfecting takes it a set further, though. This is all about killing the germs that might cause harm to your garden. It’s a more specific approach to keeping your plants safe. It’s especially important when you know that there’s been a fungus or pest in the garden. However, you’ll want to disinfect regularly as well.

Why Clean and Disinfect Garden Tools

It’s important to both clean and disinfect your garden tools for many reasons including:

  • Prevent spread of disease in your garden
  • Prevent spread of pests in your garden
  • Prolong the life of your tools
  • Keep the tools in the best working order to make working with them easy and efficient
  • Having a good garden routine, including cleaning, helps maximize the mental health benefits of gardening

Frugal Ways To Clean and Disinfect Your Garden Tools

In last year’s article, we covered five frugal ways to disinfect your garden tools:

  1. Bleach water
  2. Distilled white vinegar
  3. Alcohol
  4. Trisodium Phosphates
  5. Bleach-free disinfectant wipes

You can check that article for more details about each of those. Today, we’ll look at even more frugal ways to clean and disinfect your garden tools.

Frugal Cleaning Options

  • Cloths and rags. Part of cleaning your garden tools is simply wiping the soil off of them. Therefore you can use cleaning cloths, including rags, to clean your garden tools. Simply wipe them down. You can do this after each use, weekly, or at least right now for spring cleaning.
  • Sponges and scrubbers. If the dirt on your tools is a bit more persistent, then use a sponge to scrub it off. You can also use a wire brush for the same purpose. Add some elbow grease.
  • Plain water. Hose down the hose. In other words, simply spray clean water onto your garden tools to clean them.. You might also wash them in a bathtub or power wash them with a pressure washer.
  • Soapy water. Be careful about using soap in the garden because it can be bad for your plants. That said, you can use it to wash your tools. Be sure to rinse them completely and fully dry them before using them again.
  • Baking soda. This makes a great scrub for deeper cleaning. Mix it with water to create a paste that you can scrub with.
  • Lemon juice: Squeeze fresh lemon juice onto your tools and scrub them with a brush or sponge. Let the lemon juice sit on the tools for a few minutes, then rinse them with water and dry them with a clean cloth.
  • Sandpaper: If your garden tools are rusty, you can use sandpaper to remove the rust and restore their surface. Simply rub the sandpaper over the rusted area until it’s gone, then wipe the tool clean with a cloth.
  • Sand. That’s right – sand can clean your garden tools. You put clean fresh sand into a bucket. Then you mix in vegetable oil to moisten it. Put tools like shovels into the mixture and rub them around. This both sharpens and cleans the tool. Then brush off the sand.

After cleaning your tools, you might want to coat any metal parts with vegetable oil. This is a great frugal way to prevent rust.

Frugal Disinfecting Options

When you’re ready to disinfect your garden tools, there are many frugal options in addition to the five mentioned above. These include:

  • Hydrogen peroxide. Like alcohol or bleach, this is another effective disinfectant for garden tools. Mix equal parts hydrogen peroxide and water. Put that on your tools and let it sit for a few minutes. Rinse and dry the tools.
  • Tea tree oil. Mix a few drops in water. Apply to your tools, let them sit, and then rinse and dry. There are other essential oils you may use as well. Always research what is safe for the specific plants in your garden.
  • Apple cider vinegar. This is similar to using distilled white vinegar to disinfect your garden tools.
  • Grapefruit seed extract. This is another natural disinfectant that you can combine with water to make a solution to disinfect tools.
  • Boiling water. We all know that boiling water helps make it safer. It is also great for disinfecting other things. So, use it on your garden tools.
  • Steam cleaner. This is a surprisingly effective way to disinfect garden tools, and it’s frugal if you already own one. Simply fill the steam cleaner with water, and use it to steam the tools. The heat from the steam should kill any bacteria or viruses on the tools.
  • Sunlight. Did you know that sunlight is a natural disinfectant that can help kill bacteria and viruses on garden tools? So, leave them out in the sun. Make sure to rotate them regularly so all parts are disinfected.

These are frugal, natural options. You can also use other cleaners but you want to make sure that they are safe in your garden. You should always thoroughly rinse and dry after disinfecting.

Read More:


5 Frugal Ways To Disinfect Garden Tools

Frugal Ways To Disinfect Garden Tools

Did you know that it’s important for you to disinfect your garden tools? It is! You want to do this regularly. If you’re having a problem with fungus or bacteria, then you should even disinfect items before using them to work on different sections of the garden. It’s not hard, though, so don’t fret. And it doesn’t have to be expensive either. Here are some frugal ways to disinfect garden tools.

Why You Have to Disinfect Garden Tools

First of all, you should regularly clean your garden tools. After all, the better shape you keep your tools in, the longer that they’re going to last, and the better they’ll do their job. So, you should regularly clean with water, soap, scrubbing, etc. to keep those tools in good shape. Get rid of the dirt, sap, rust, etc.

You don’t have to disinfect garden tools every single time that you use them. However, you’ll want to do so periodically. For example, you might do so at the start or end of each gardening season. That said, if you experience a problem with fungi or bacteria, get proactive and disinfect more often. After all, you don’t want to spread the problem all around your garden!

Frugal Ways to Disinfect Garden Tools

Here are some of the most common frugal ways to disinfect garden tools that we know:

1. Bleach Water

There’s a lot of debate about whether or not you want to use bleach in your garden. If you’re growing food that you want to eat, or you regularly have pets or kids in your garden, then you might find bleach to be too toxic an option. However, we’ll start here, because it’s one of the most common frugal ways to disinfect garden tools. Gardening.org recommends a solution of nine cups hot water to one cup of chlorine bleach.

Note: Bleach is fine for most of your garden tools but it’s not good for your plants. It can kill them. Therefore, if using this option, do your disinfecting away from the actual garden itself.

2. Distilled White Vinegar

For those of you who don’t want to use bleach in the garden, which is totally understandable, try vinegar instead. Gardening.org says that you can use distilled white vinegar on its own or make a 50/50 solution with water. Either way works to disinfect your garden tools.

Note: Like with bleach, you want to use the vinegar outside of the actual garden area in order to protect the plants.

3. Alcohol

Obviously, alcohol is one of the most common disinfectants that most people use around the home. Chances are that you already have some. University of Florida’s Gardening Solutions says it’s a terrific option for disinfecting garden tools. When you use bleach or vinegar, you usually have to create a solution in which to soak your tools. In contrast, you can simply wipe alcohol onto your tools, wipe it off, and you’re ready to go. If you do want to make a solution, it can be as much as 100% alcohol or you can distill it with water but it shouldn’t be less than 70% alcohol. U of F says that you can use ethanol or isopropyl alcohol.

4. Trisodium Phosphates (TSPs)

Here’s another one from the University of Florida list. They note that it’s a great option because it’s one of your most frugal choices. However, it’s also highly corrosive, so you want to be especially careful if using this one. Like with the bleach water, you want nine parts water to one part TSP. And, as you probably would with bleach, you want to keep it far away from your skin.

5. Bleach-Free Disinfectant Wipes

HGTV recommends this option for easily wiping down tools. If you want to disinfect regularly between uses, this can be a terrific option. We wouldn’t necessarily have always put this on a list of frugal choices. However, with COVID-19, many people have started using these regularly in their homes. If they’re already worked into your budget, then they’re a fairly frugal choice.

Read More:


5 Fun Ways to Use Yarn in the Garden

using yarn in the garden

I am a crafter. Mostly, I crochet, although I also knit and weave and collage and enjoy some other crafty activities. As a result of my craft, I have a lot of yarn in my home. Most of it I will use to crochet, of course. However, over the years, I’ve found that yarn can be used in myriad ways. So, I got to thinking, how could I use yarn in the garden? Here are five ways that the frugal material of yarn can add both beauty and function to your gardening:

1. Self-Watering Plants With Yarn

Don’t spend a lot of money on an automatic drip system to water your plants. Instead, use yarn. Real Simple explains that you can place a jar of water near your potted plants. Insert one end of yarn into the jar and the other deep into the soil of the plant. When the plant needs water, it will actually draw what it needs through the yarn from the jar. Amazing, right?!

2. Make Wool Compost

There are many different fiber types when it comes to craft yarn. If you craft with wool, then you have a lot more options in the garden. It’s a natural material that will break down in the environment. It’s safe for your land and your plants. For example, you can actually make a wool compost that works as well as peat does for mulching.

3. Make a Yarn Trellis

There are many different yarn trellis patterns and tutorials. Whether you make a simple yarn grid or a complex crochet trellis, you can use this in your garden to grow your plants vertically. It’s one of the most affordable ways to build up and it’s pretty as well.

4. Decorating the Garden with Yarn

Speaking of pretty, decor is one of the most popular ways to use your yarn in the garden. You can yarnbomb your plants and trees, knit or crochet ornaments to hang in the garden or create an entire little yarn fairy garden. Yarn adds even more color to your garden.

Note that you can also use yarn to label your plants. Assign each plant a specific color of yarn. Tie that color to a plant stake to place in the ground near the seeds for that plant. This is a great way to both decorate your garden with yarn and also remember what you planted where before it starts to grow each season!

5. Plant Holders

You can decorate any of your plant holders, indoor or out, using yarn. You can crochet or macrame hanging baskets to hold pots that you want to keep up off of the floor. Even if you don’t have any specific craft skills, you can wrap yarn around containers or pots of any size to decorate them.

BONUS: Crafting in the Garden

Although I didn’t include it in the main list, I can’t neglect to mention the most obvious way that you can enjoy yarn in your garden. You can take your yarn out into the garden and craft there! Knitting and crochet offer so many health benefits. So does nature. When you combine the two by crafting in the garden, you reap more benefits of each/

Read More:


4 Cost-Effective Organic Garden Fertilizers


4 Cost-Effective Organic Garden Fertilizers

Regardless of what you’re growing, your plants need nutrients. Without fertilizer, your plants will fail to thrive and grow big and strong. In the case of edibles, a lack of nutrients can limit your crop and lead to poor production. Unfortunately, many fertilizers on the market are expensive. Thankfully there are cost-effective organic fertilizers you can use to boost your garden’s productivity.

A word of caution

Before I jump into a list of cost-effective organic fertilizer suggestions, I want to talk a bit about fertilizing in general. Piling on fertilizer will NOT automatically make your garden more lush and productive. Fertilizing without testing your soil first can lead to a host of problems down the road. With fertilizer, more is not always better.

Always test your soil first to find out whether your garden is lacking nutrients. Read up about plant nutrient needs to ensure you’re applying the right fertilizer.

While organic fertilizer is a lot less harmful to the environment than synthetic fertilizer, too much of it can still pose problems, so be cautious! If you think your plants are hungry for nutrients, double check first. They may be stressed or ailing for a different reason.

Organic fertilizers are an excellent alternative to synthetic ones because they help build soil quality over time and improve the soil’s ability to retain nutrients and water. They’re a lot less concentrated, which helps prevent overfertilization—though, it’s still possible with certain commercial options.

Cost-Effective Organic Fertilizers

Fertilizers can be expensive. Organic options are even more so! So what are the options available for a frugal gardener? Here are a few cost-effective organic fertilizers to choose from:

Worm castings. Set up a worm farm or attract worms using a bucket system and enjoy the fruits of their labor. Castings is a nice way of saying poop, but this excrement is mighty powerful! Worm poop is high in nitrogen and full of beneficial microbes and bacteria.

Coco coir. Coconut husks are an inexpensive, earth-friendly alternative to peat moss. While coir doesn’t contain nutrients, it helps condition the soil and improves water and nutrient retention.  It’s also a great mulch option.

Homemade compost. It’s easy to make your own compost at home! You’ll need a balanced mix of kitchen scraps and other materials like dead leaves and grass clippings to get some rotting action going. Over time, the materials break down into a powerhouse of nutrients for your garden.

Seaweed. Sea kelp fertilizer is pricey, but if you live near a shoreline, you can collect your own smelly seaweed, let it rot for a bit, and make a seaweed fertilizer tea. It’s not ideal for people who are sensitive to pungent smells, but it’s a great totally free source of nutrients!