The Pandemic: a Gardener’s View

pandemic through a gardening lens

It’s been a tough week. Because of what I do for a living, I’m unable to unplug and decompress amidst all this. I feel overwhelmed, exhausted, and mentally spent. But while the future seems uncertain and I’m anxiety-ridden at all hours, I try my hardest to look on the bright side. It could always be worse. Of course, that realization leads me to the reality that there are so many people right now who are in dire straits and worse off. So, in the end, my attempt at a positive outlook fails me.

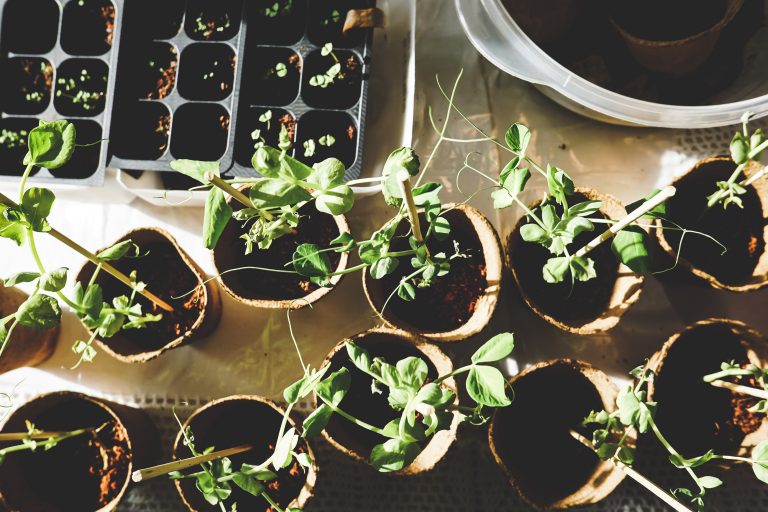
Still, if I quiet my mind for a moment, I’m able to appreciate some of the small miracles around me. It’s seed starting season, and it’s been hard to focus on all the tasks I’ve needed to get done. I’ve lost track of what needs to be started when! But seeing those little seedlings pop up from the soil is always awe-inspiring. What lessons have I learned from gardening that apply to this pandemic? 

Keeping Things Clean

My tomato, pepper, and eggplant starts are healthy as ever. The soil blocks are holding strong, and I can see the sturdy roots developing. Oddly enough, seeing my seedlings doing so well made me think about the link between gardening and this pandemic. Gardeners, better than most, can appreciate the importance of proper sanitization and hygiene. The invisible pathogens that live in the soil, on garden tools, and on accessories all have the potential to obliterate seedlings and crops. On a conceptual level, I understand that hand washing and disinfecting surfaces is vital to stop the transmission of the virus, and I’ve been rigorously doing my part to maintain personal hygiene and socially distance myself. But as a gardener who has seen the plant-related consequences of poor hygiene and contamination, I’m keenly aware of the importance of social distancing and hand washing. 

The Ultimate Lesson

If you’re a gardener who has never dealt with damping-off or diseases caused by contaminated soil, you’re incredibly lucky! But I suspect that plenty of dirt-digging enthusiasts can identify with the shock of watching everything you’ve worked hard to cultivate wilt and flop over. It’s devastating. It’s even more upsetting when you realize the fault was your own. As a beginner gardener, I wasn’t careful with my trays and tools and didn’t bother to wash pots anew each year. Why bother? It’s natural! It’s all going to be going in the dirt anyhow! Ah, what a naive gardener I was! 

Today, I’m cautious to the point of being paranoid, but in the end, I’ve been rewarded with beautiful, strong seedlings that I can’t wait to plant in the ground. 

If there’s a lesson here that relates to this unprecedented world pandemic, it’s that you’re better off safe than sorry. Wash your hands and stay home. Let’s all stay strong together. 


Can You Grow Potatoes in Containers?


Growing potatoes is so incredibly fun. With a little bit of patience, you’ll be digging up spuds towards the end of the season. The taste of freshly dug potatoes is unparalleled. People say the same about tomatoes, but I genuinely think potatoes win the contest for best-tasting garden edible. Compared to a storebought potato, one from the earth has a creamy, potato-y quality that’s impossible to match. There’s also so much more variety available when choosing seed potatoes compared to shopping the root vegetable aisle at your local grocer: fingerling potatoes, red-skinned varieties, and even blue spuds. But how do you grow potatoes if you don’t have tons of in-ground space?

Can You Grow Potatoes in Containers?

Yes! Absolutely! I wholly recommend growing them in containers instead of using in-ground real estate or large raised beds. A single 5-gallon container yields about 1.5 pounds of potatoes.

Benefits of Growing Potatoes in Containers

What’s the advantage of growing potatoes in containers? Here are the benefits of growing in containers:

  • Inexpensive. There’s no need to build a garden bed, there are plenty of cheap container options available from fabric pots to upcycled vessels like empty recycling bins.
  • Easy to relocate. Did you plop the containers somewhere where you’ve realized there’s not enough sun? Simply drag the containers to a sunnier spot.
  • Easy harvest. No need to dig around for hours to find spuds. Dump out the container and sift through the dirt. Since you’re less likely to leave behind diseased potatoes, there’s also a decreased chance of pest and disease in the following year.
  • Great for small spaces. Don’t have a large garden? You might think it’s time to give up on planting potatoes. Not so fast! Containers are great for gardeners with limited room. Grow taters or your porch or balcony.

How to Grow Potatoes in Containers

Plant 1-2 seed potatoes in a single 5-gallon bucket and double that amount for large containers. Fill your container up with enough soil (mixed with plenty of compost) to cover those newly planted seed potatoes.

As days go by, you’ll notice foliage start to appear. Continue to add enough soil mix to cover the stems and tubers, but don’t bury the leaves.

Potatoes need plenty of sun and regular watering. However, it’s best to avoid high-nitrogen fertilizers as they will increase foliage production but reduce tuber formation.

When Do I Harvest Potatoes?

Potatoes are ready to harvest when the tops have completely died back. Attempting to dig them up too soon may hinder tuber development and leave you with a smaller crop. Still not sure when the time is right? Read more about harvesting potatoes.


Soil Block Success!!!

Soil Block

Flickr via Kevin Doncaster

Whenever I experiment with something new during the seed starting season, I feel incredibly anxious. What if it goes wrong? What if I end up with unhealthy starts? Believe me. I’ve made my fair share of mistakes that have resulted in disaster. 

I tried using jiffy pellets one year, and my seedlings were stunted. Another year, I tried plastic pots. It was a slightly pricier endeavor than the peat pellets, but I hoped that it would result in more vigorous seedlings. It ended up being a frustrating experience. The pots were flimsy, and many of my seedlings became root-bound.

Another year, everything was going great, but the humidity levels in my basement grow space were less than ideal. I ended up trashing most of my seedlings because of damping off. 

I’ve done things to kill seedlings, and I’ve had things happen that were totally outside of my control. Needless to say, I was really nervous about trying something new, but I was excited to see if it would make this part of the gardening process a bit easier and a bit kinder on my wallet. 

Creating Soil Block

Last weekend, after a particularly long day and a week that felt like it was never going to end, I finally decided to start some seedlings—early March is the time to start tomatoes, peppers, and eggplants if you’re in Zone 5. 

I was exhausted but determined to get going. Nightshades are notoriously slow to germinate, so I didn’t want to wait any longer. 

I dumped some soil mix into a bucket (I bought a specialty sterile mix this year because honestly, a few extra bucks seemed worth it to avoid the massacre of seedlings I dealt with last spring) and added water until I got a goopy consistency. 

What I Learned

In retrospect, I don’t think I added enough water. Lesson learned. For the next batch of seedlings, I’ll aim for a slurry and not a goop.

Soil blocking was less messy than I envisioned, but you definitely get your hands dirty! I rolled up my sleeves and pushed the metal blocking tool into the soil goop until there was water seeping out a bit. 

Then, I popped the perfectly formed blocks onto my tray. 

I was amazed at how well-formed the blocks were and still are. A few are crumbling slightly, but all in all, they’re doing fine.

https://www.instagram.com/p/B9Nma-3DeSG/

I definitely have to work on my technique—the mix should have more water and I need to compress the blocks a bit more, too—but I feel confident that this is a method I’ll be using from now on. I’m so grateful not to have to deal with pots ever again. What a relief!

Looking Forward

I’ve been misting the blocks and watering from underneath (something I usually do with all my plants) and I’m eager to see how things go when it’s time to transplant the seedlings. Though perhaps that’s thinking too far ahead. Maybe I’ll just wait and see if anything actually sprouts! 


How to Get Free Worms for Your Garden

Free Worms

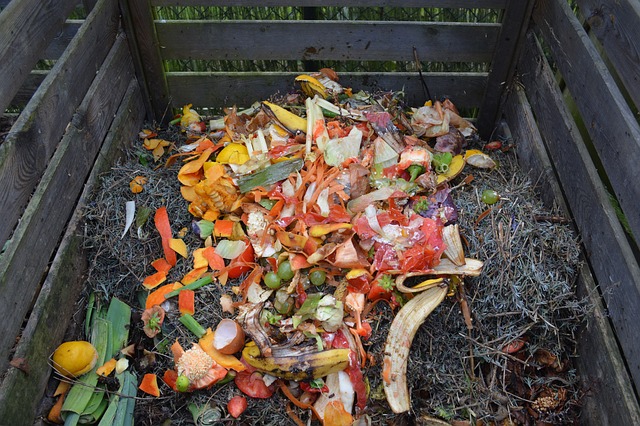
Composting is an economical way to recycle household waste like kitchen scraps and yard refuse (dead leaves, grass clippings, etc.). It requires minimal effort, and in return, you get free fertilizer for your garden! 

Using your homemade compost in place of commercial fertilizers is not only cheap, but it’s also better for your garden. Compost delivers nutrients to the soil, conditions it, and increases the overall health of your garden environment. Healthy soil makes for healthy plants! 

Traditional composting is a worthwhile endeavor, but if you’re looking for an extremely efficient and effective strategy for turning your kitchen and garden waste into black gold, why not try your hand at vermicomposting?

With the help of hungry worms, you can convert organic material into a nutrient-filled medium for your garden. 

How To Get Free Garden Worms

If you’re starting your compost pile, worms won’t immediately be present. It’s possible to purchase red wigglers to add to your bin, but if you’re on a tight budget or simply want to save some money, try the following to attract free worms to your compost area:

  • Feed them. Continually add kitchen scraps to your compost pile or bin. As they munch and crunch on the kitchen waste, they leave behind castings (worm poop), which is excellent for your garden.
  • Sprinkle cornmeal. Whether you want to attract worms to your garden or compost, use cornmeal to bring forth the worms. 
  • Add ground-up eggshells. This is a bit of a controversial suggestion, but some swear by it. Shells help worms digest their food. The drawback is that eggshells don’t break down like other types of kitchen waste. Always grind them up, don’t add them in chunks. 

If you’re trying to attract worms to add to your elevated compost bin and want to transfer caught worms, it’s possible to fashion a type of worm trap using a bucket.

Drill some holes into the bottom of a bucket and pop it into a shallow hole you’ve dug in the ground. Fill the bucket with food for hungry worms (fruit and vegetable scraps are a good choice). Add a bit of soil and cover with some type of lid. The lid keeps other critters from getting into the trap. Continue to add food scraps, and over time, you’ll find yourself with a sizeable worm population that can go straight into your compost pile.

What worms don’t like

You can add all the worms you want to your garden or compost, but they won’t stick around very long in an inhospitable environment. Here’s what to avoid when attempting to attract worms to your garden and compost bin:

  • Keep the chemical fertilizers and pesticides to a minimum or banish them altogether. 
  • Try to minimize how often you till the soil to prevent disturbing these little creatures.
  • Use organic mulches in place of synthetic options.
  • Avoid overwatering. Whether you’re moistening your compost pile or watering your thirsty plants, be careful not to flood out resident worms. Underwatering is also a no-no.

An Important Note

The worm you catch this way may not all be red wigglers, however, but it’s doubtful that you’ll introduce any harmful bugs into your compost this way. 

Some things that attract worms also attract pests (rats, flies, etc.). If adding worm bait to your compost or DIY trap, be sure to properly secure the lid to prevent other critters from finding their way inside. 

Note that in most cases, worms will find their way into your garden and compost bin if the conditions are right. If you see worms hanging around, it’s a good sign! 

Want a visual guide to building a DIY worm farm? Watch this video that demonstrates how to create your own worm trap and catch worms for free without having to spend a dime.


I’m New to Gardening: Is Starting From Seed Worth It?

Starting From Seed

‘Tis the season to start fielding questions from curious friends interested in starting a garden. One of my friends recently moved into a new home and is keen to grow a few incredible edibles in her available outdoor space. She’s unsure of whether to bother with seed starting and wondered if she’d be better off simply buying plants at a local nursery.

What should she do? Here’s a breakdown of the two options.

Benefits of Seed Starting

Seed starting is a great way to get started with gardening. Here’s why:

  •  There’s so much choice. When you’re starting from seed, you have a whole slew of plants available to you. You’re not stuck with the single variety available at the local nursery. 
  • You have control over plant growth. You decide the products used to grow your plants. Do you want to use organic methods? Go right ahead! When buying from a nursery, you may not have all the information about a plant’s history. You also need to pay close attention to any hitchhikers when purchasing plants from someone else. Are there pests hidden in the foliage? Are there any signs of disease?
  • It’s a rewarding process. There’s nothing that compares to the feeling of watching a plant go from seed to harvest. It’s a seriously fulfilling adventure. 

Of course, seed starting also has plenty of drawbacks. It requires time and effort. You’ll need to watch your plants for signs of distress and work to ensure they have everything they need (light, water, nutrients, and room to grow). 

While seed starting setup costs vary significantly, there’s some initial investment required. Though, it’s easy to start seeds on a budget. 

The risk of failure is probably the biggest potential drawback, but I’m of the option that failure is the best way to learn!

Benefits of purchasing from a nursery

I think buying from a nursery has its pros, especially if you’re just starting and plan to work in a small space. Buying a handful of plants isn’t much more expensive than starting a shelving unit full of seeds. 

  • Plant availability. While you have a lot more variety at your fingertips when starting from seed, you’ll find hard-to-grow plants at your nursery. Things like asparagus, fruit bushes, and fruit trees are tough to grow from seed but are readily available at local nurseries. 
  • Simplicity. If you’re a busy person, the time required to take care of seedlings is something to consider. Buying from a nursery is easy and requires minimal effort. 
  • Questions answered. At specialized nurseries, the staff is available to answer all of your questions, which is super useful if you’re totally new to gardening.

Of course, there’s no reason you can’t do both! Last year, contaminated soil mix caused most of my seedlings to die, and I was left with only a handful of viable starts. I ended up buying a bunch of plants at my local nursery to make up for my devastating loss. 

Can you think of any other benefits to either option that I forgot to mention? Let me know! Leave a comment with your thoughts.


5 Common Reasons Why Your Houseplant Isn’t Blooming

houseplant bloom

You brought home a gorgeous houseplant or received one as a gift. You admire it for a week or so while it bloomed gloriously. Soon after, the flowers fell away and the houseplant isn’t blooming anymore or doesn’t look as radiant as it once did. 

Are you struggling to get that plant bloom again? Maybe you’ve never even seen the blooms you’ve been promised at all. Here are a few reasons why a houseplant isn’t blooming.

The plant is too young

If you’ve never seen flowers on a plant that’s supposed to bloom, it may be that the plant is far too young. Certain plants don’t bloom until they’ve been around for a few years. Some species only bloom once or twice in a lifetime. 

It’s too dark or bright

Lighting is an essential factor in bloom production. Some plants, for instance, require a hibernation period before they can put out flowers. Others won’t bloom unless they receive adequate sunlight hours. Most plants need at least 6 hours of sun in order to produce flowers. You’ll have to plunge certain plants in darkness (e.g., poinsettias) to force them to flower. 

It’s too hot or cold

If you’ve set your houseplant near a chilly windowsill, the low temperatures may be hindering bloom production. Some plants, however, require a period of vernalization (exposure to chilled temperatures) to produce flowers eventually. Extreme shifts in temperature can also affect blooming. 

Feeding issues

If you’re not feeding your plant correctly, it may not have the required nutrients to produce flowers. High-nitrogen fertilizers will produce lush green foliage, but you’ll be hard-pressed to spot blooms. Likewise, if your plant is not receiving enough water, it may refuse to reward you with flowers. 

You’ve disturbed the plant 

Some houseplants may not bloom during a season in which they’re transplanted. It can take some time before the plant is settled back in again and ready to flower. 


A New Seed Starting Adventure With Soil Blocks

Soil Blocks

I’m rushing to set up my grow shelves and get going with seed starting this year. I came down with another illness over a week ago and it hit me hard. The second time this winter! And it was a nasty bug that left me unable to move from the couch. I spent my time laid up thinking about how I was running behind with all my seed starting activities. As soon as I felt better, I began an inventory of my seeds and ordered seed starting mix. 

I also decided to invest in a whole new seed starting tool this year: a soil blocker. 

I’m tired of buying crappy pots and DIY vessels to start seeds. Even when I locate a good deal, it always seems insane to spend money on containers that are difficult to sanitize and keep looking like new. I abhor having to re-pot tiny seedlings into bigger pots, too. In my quest to simplify the process, I decided to experiment with something new — soil blocks.

What are soil blocks?

Instead of filling pots and containers with soil mix, soil blocking involves a metal press-like tool that compresses wet dirt into manageable, uniform clods. Plant seed directly into the cube and never have to deal with pots again! 

Soil blockers are available in multiple sizes, and it’s possible to pot a smaller soil cube onto a larger one. A significant advantage of this seed-starting method, though, is that plants are much more unlikely to become root-bound than their potted counterparts. 

A breakdown of soil block advantages 

Soil blocking certainly involves some up-front costs. I spent about $40 for a metal blocker that will create blocks of 2-inches by 2-inches. I intend to purchase another block to make 4-inch by 4-inch blocks, as well. You’ll also need trays to house your finished soil block seedlings—this is something I already have. If you need a quick, cheap solution, head to the Dollar Store and grab some inexpensive baking sheet packs to house your blocks. Once you’ve purchased these supplies, however, the only renewable costs involved are seed and soil mix. Here’s why I’ve decided to switch to this method:

  • No more pots. They’re costly and aren’t always re-usable. Quality varies significantly, and for those with limited storage space, they take up a whole lot of room. No more time is wasted sanitizing pots each winter in preparation for seed starting. 
  • Quick and efficient. Making blocks is easy and a lot less time consuming than filling small awkward-shaped pots.
  • No-fuss transplanting. Potting up is a pain in the butt with containers but with soil blocks, it’s incredibly straightforward. Moving plants into the garden is similarly easy. Plants are a lot hardier and since they’re never removed from their containers, they experience far less transplant shock than potted seedlings.
  • Space-saving. In previous years, the cheapest pots I could find were round in shape, and it was difficult to make efficient use of my shelving space. Soil blocks don’t take up as much space. 
  • Healthy, strong starts. Plants never become root-bound and roots are much healthier than with plants left in pots. Far less handling and moving around during the seed starting process produces robust seedlings. 

I’m looking forward to sharing my progress with soil blocks this season! Here’s hoping it goes smoothly. 


Expand Your Gardening Possibilities with Seed Swapping

It’s nearly time to start seedlings, but you’ve noticed your seed supply is a bit thin. Or perhaps you’re bored with the varieties you typically grow and want to try something new. Seed swapping is the perfect way to top up your seed inventory on a budget. 

What is seed swapping?

It’s exactly what it sounds like! Trading seeds with other gardeners to get rid of excess seed and discover new varieties without spending loads of money. Usually, seed swapping involves trading saved seeds, but that’s not always the case. Don’t be shy to ask about the provenance of the seed you’re receiving. 

Benefits of seed swapping

But it’s so easy to buy seeds from seed catalogs! Why would you bother seed swapping at all? Here’s why seed swapping is such a worthwhile pursuit:

  • It’s free. Although seeds are some of the cheapest gardening supplies, buying several packets does tend to add up. I’ve easily spent over $50 on a single seed order. If your gardening budget is tight, consider trading seeds instead of perusing through a seed supplier’s catalog. 
  • It’s a way to discover new plant varieties. Not all plant varieties are readily available. Many seed suppliers stock commonly requested varieties. You won’t have trouble finding beefsteak tomato seed anywhere, but if you’re searching for a rarer variety, a seed swap may be your best bet. Swapping is the perfect way to find new types otherwise unknown to you or unavailable elsewhere.
  • It’s social. Gardeners don’t always get a chance to interact with one another. Gardening—aside from community gardening—is largely a solo activity. Going to organized seed swaps is an ideal opportunity to meet fellow gardeners and swap not just seeds but gardening-related tips and tricks. 
  • It produces less waste. Fewer seeds are wasted if you manage to swap your excess supply successfully. Some seeds have a shorter lifespan than others. If you have an abundance of freshly harvested parsnip seeds, for instance, sow what you need and see if you can trade with someone else since those seeds aren’t usually viable for longer than a year. 

Where to swap seeds?

Wondering where to go to trade seeds with other gardeners? Check out local seed swapping events. In Canada, Seedy Saturdays are popular weekend events that help gardeners prep for the upcoming gardening season. Many Seedy Saturdays include seed retailer displays, but swapping is also encouraged. Find out more at the Seeds of Diversity website.

Seed Savers also has a page to facilitate seed swapping. 

Community environmental days are anther possible seed swapping venue. If there’s no organized seed swap planned for your town’s next Earth Day event, ask if you can be involved in getting something started. 

Your community garden is another place to chat with other gardeners and trade seeds. Inquire with green-thumbed community members, friends, and family. Remember, you don’t necessarily need to get something in return. Giving away seed is also perfectly acceptable!

Find out if your local garden club organizes seed swap events in the spring. Or check out online gardening forums to find seed swapping opportunities. I’ve met several gardeners on Instagram who are happy to trade and share seeds and plant cuttings. 


5 Super Compelling Reasons to Save Empty Seed Packets

Flickr.com via Chiot’s Run

Peek into my gardening cabinet, and you’ll find a slew of gardening books, some crafting supplies, seed starting tools, my seed organizer, and a bunch of empty seed packets devoid of seed.

Why do I keep the dirty, warped, packets around? If I’m out of seed, why not throw them in the trash? Good question!

I don’t dare toss out packets unless they’re damaged beyond recognition. There are plenty of smart reasons to keep those packets close by, but the number one reason is that they contain so much information. A seed packet is an invaluable piece of reference material. Here’s what it can tell you:

  • Days to maturity: This is a crucial piece of information for garden planning. While I could easily Google it, I find it easier to refer to my saved, crumpled packets. I don’t mind hauling them out to the garden or getting them dirty during the seed starting process. I’m also more confident in the seed packet info than I am in a Google search. Often, the seed packet estimate is much more accurate than anything I might find online. The best information is straight from the seed source. Another seed seller may sell seeds for a plant with an identical name but there may be small variations in time to maturity.
  • Region-specific info: Some seed sellers are better equipped to note region-specific information on packets. A seed seller based in California, might not think to include information for cold-region growers, for instance. If you spot region-specific info on a packet, hold it close! I cherish those seed packets that contain info for my specific growing region.
  • Harvesting tips: Harvesting information is readily available online, but again, it’s sometimes not very variety-specific.
  • History: Historical information won’t necessarily help you cultivate a healthy crop, but it’s super interesting and hard to find elsewhere, especially if you’re purchasing from a specialized seller.
  • Spacing guide: As a Square Foot Gardener, spacing per square is usually really simple, but some plant varieties have unique spacing requirements that I might not find listed in the SFG book or online. I’ll refer to the listed packet spacing for this info.

I also like to take notes or stick post-its to my leftover seed packets with observations and my personal experience growing a certain plant. If the packet says days to maturity is 50, but I found it to be longer, I’ll mark that on the packet. It may be my specific growing conditions that create the difference, and it’s essential to keep tabs on those small variations for when I’m planning out my planting schedule the following year. The added notes also provide me with info otherwise not on the packet. I find it easier to refer to these notes than to use a journal or other garden diary.

Old packets are also useful if you plan to save seeds. You’ll have the original info on hand, and you won’t have to worry about forgetting plant particulars.

Do you keep old seed packets? If you don’t, I hope that you’ll reconsider after reading this!


6 Incredible Flower & Garden Shows to Visit in February

Are you missing your garden and can’t believe it’s still winter? Are you searching for an out-of-the-box activity to get yourself out of the house? I know. It’s so tempting to wait out the winter wrapped in a blanket. Curl up on the couch with a good book, and it’ll soon be time to get started on gardening tasks. Even the most introverted among us need a bit of time out, though, don’t we? 

If you’re on the hunt for a fun indoor activity to do by yourself, with friends, or with kids, consider visiting a flower show. These horticultural exhibitions are the perfect place to satisfy cravings for digging in the dirt. Scope out beautiful blooms and enjoy the scent of fresh greenery by visiting one of these flower shows and garden-related exhibitions taking place this February:

Atlanta Botanical Garden Flower Show: Expressions

Taking place from February 21st until February 23rd, the exposition includes not only fresh flowers but also art, photography, and more all inspired by nature’s colorful blooms. 

B.C. Home + Garden Show

Visit the home and garden show between February 19th and February 23rd and scope out a variety of home and garden related booths.

39th Annual Connecticut Flower & Garden Show 

The popular New England based flower show includes a gorgeous garden display, competitions with hundreds of entries, booths filled with activities and wares, along with a slew of informative seminars led by radio personalities and horticultural experts. 

Northwest Flower & Garden Festival

For those located in Seattle, Washington, the Northwest Flower, and Garden Festival features a variety of workshops, seminars, and plenty of opportunities to shop for garden-related goods. Exhibitors include over 30 nurseries and plant retailers. 

Dallas Blooms

Visit the Dallas Arboretum and Botanical Garden starting February 28th (ends April 12th) to ogle the over 500,000 flowers on display. The on-location gardens also feature plenty of educational material for curious gardeners young and old. 

PBS Wisconsin Garden & Landscape Expo

The expo takes place between February 7th and 9th. Tickets cost just $10 at the door and are available in two or three-day passes, as well. Notable guests include Joe Lamp’l, Lisa Eldred Steinkopf, and Venice Williams. Check out the website for a schedule of activities, including plenty of fun gardening-themed stuff for kids (those under 12 get in free!).