Conserve Water & Save Money

Since it’s the middle of summer in my zone 7 garden right now I thought it might be good to review some principles of watering our gardens & trees. If you’re paying a monthly water bill, you don’t want to waste money and when you do water, you should be getting the most for your money by watering efficiently.

First, for those of you with lawns, there are some rules of thumb to use when trying to keep that grass lush and green during the summer months:

  • When watering your lawn, water slow, long and deep. A sprinkler should spread water evenly and slowly. Set out sprinklers in the cooler parts of the day to cut down on evaporation.
  • Run off is considered very detrimental to your water use as well as your soil, so watch your sprinkler to see you’re not watering the driveway, or sending nutrients from your topsoil down the drain.
  • Lawns require an inch of water weekly for best growth, either from rain or irrigation or both. Rather than buy a rain gauge, use a coffee can to measure the amount of water applied.
  • It takes about 625 gallons of water to apply an inch to 1,000 square feet of lawn area. After watering, the soil should be saturated approximately 3 to 4 inches.

Caring for Your Gardens While Conserving Water

Watering with a hose and nozzle is not as effective as leaving a hose placed at the base of the tree or shrub. Let the water slowly soak into the soil, watering the root system, rather than the plants. The amount of time this takes will vary, depending on the make up of your soil; if in doubt, use your shovel and dig a small test hole to see how the water is being absorbed in your garden.

By making sure you do a thorough watering of the soil around the plants, you will be watering less, and saving more on your water bill. Each plant or bed should be saturated approximately once every two weeks or less depending on the weather in your area.

Many gardeners use a soaker hose system, so they are able to saturate the soil of an entire garden area without having to continually move the hose from plant to plant.

New plantings will require more frequent watering than established plants. The same type of saturating should be exercised, but once a week may be necessary for new plants.

The use of mulch around your established plantings is an excellent method of conserving water. Gardens which are exposed to the sun and drying winds without cover will dry out rapidly and you will find it difficult to do a good job watering and creating strong healthy root systems.

Use caution when mulching brand new plantings, some mulch products will burn small plants. Simply clear a circle around the plant until it takes hold, then move the mulch in closer to cover the root system, not necessarily up to the base of the plant.

Some of the more effective materials used for mulching are peat moss, wood chips, straw, salt marsh hay, sawdust, pine needles, hay, leaf mold, compost, dried bark and leaves. You will find you use much less water if you have at least a 2″ layer of mulch. Again, digging a test hole in the garden is the only way to really know how your watering and mulching system is doing.

With many communities exercising watering restrictions, it is becoming more apparent we all need to conserve this valuable resource. By combining mulching and smart watering techniques we can each do our part to adhere to local conservation guidelines as well as keep our water bills in check.

Read More:

The Best Piggy Banks That Can Help Teach Kids Money Management Skills


Cats & Your Garden

One of the things that many gardeners dislike is having cats visit their garden. If you would like to keep cats away from your garden, there are some frugal steps that you can take that can help relieve the situation:

First, remove the poop. I know…icky! If you don’t, however, the cats will think the area is theirs & they will just continue using your garden as the litter box. You will need to keep repeating this step until you can convince the cats to use another area.

The next step is to, water, water, water your garden and then water it again. Cats hate water, and hate wet soil too. One of your kids high powered water guns works well as a deterrent too, but you have to sit & wait for Charming Kitty to visit your garden for this to work.

Another option may be dusting the area with pepper which works for some:

  • 2 parts cayenne pepper
  • 3 parts dry yellow mustard
  • 5 parts white flour

Mix and dust into the areas of your garden that the cat has been digging in. This has to be repeated every couple days and is not effective when raining.

Another step you can take is you can apply blood meal, which acts as a fertilizer for your soil, to your garden and apparently smells nasty to cats.

A more decorative alternative is to fill in areas your cat seems to visit with more plants or some “garden art” – even if it is only temporary until your cat looses interest in the spot. A row of stepping stones into your garden will work too, anything that covers up the bare soil.

If you don’t mind the cats visiting, but simply want to keep them away from your garden plants, try leaving an area of your yard for the cats. Keep the soil worked and soft as they just love it like that which is the reason why they are always digging in just planted areas of the garden.

Another alternative to keeping cats to specific areas is to plant some catnip in other areas of your yard where the cats have permission to roam. By making other areas of your yard attractive to the cats, they will likely leave your gardens alone.

If your problem is that cats are climbing in planters to nap or dig, you can cut a piece of chicken wire & lay over the top of the pot or planter until the plants come up and it becomes too full for the kitty. Remove the wire as the plants begin to come up. The chicken wire trick also works to just lay pieces of it on top of garden soil in areas you know the cats visit.

With persistence, you and your cat can enjoy your garden together and if it’s your neighbor’s cat, perhaps you can convince it to head back home.


Is Organic Gardening Frugal?

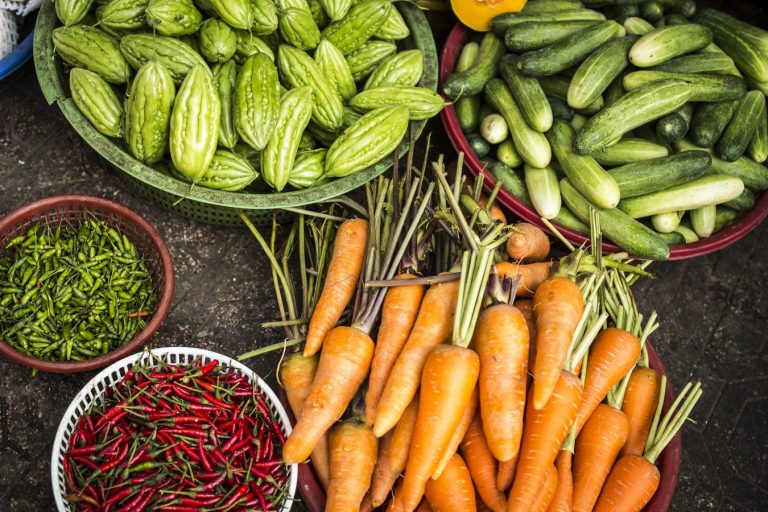
Let’s think back to our grandparents’ gardens, whether they were full of geraniums or rows of carrots or beans; my guess is all of their gardens were grown organically. I can’t remember any of them mixing up chemicals to add to their potted plants or their garden beds…but I do remember huge blossoms and giant veggies. Hmmm, what was their secret?

Only in the last couple of decades have we been pressed to purchase chemicals for our gardens. If we return to gardening practices of old (using natural products as fertilizer and practicing companion planting to ward of bugs and critters), we will be gardening organically. When you get down to basics, the natural way will always save you time and money.

The rules of organic gardening are few and they’re quite simple:

  • Start with good soil. Invest your money here in this category, enriching your soil every year if possible. Remember, earth worms make the best soil of all & they are FREE. Most county extension offices will do (or send out kits) to evaluate soil samples. This way, you will know what your particular garden is lacking and just what you need to add to make it healthy.
  • Healthy soil makes for healthy plant roots. Roots like aerated soil, full of nutrients and water. Those little worms can accomplish most of this too! Mulching will insure that your plants don’t have to compete with weeds for the water, as well as cutting down on the amount of watering you need to do. Mulch can be newsprint, old carpet pieces, straw, grass clippings or shredded tree limbs and plant debris that had been growing on your own property.
  • Healthy roots make for healthy plants and healthy plants resist drought, disease & pests, so you won’t need to buy sprays, dusts and other chemicals for your garden.

When you look at it from this perspective, the simplicity and lack of needing all the chemical treatments that cost so much makes organic gardening an extremely frugal way to garden.


Frugal Container Garden

Pots and planters can be an expensive item if you’re planning on venturing into container gardening. Instead of heading to the garden store, or the warehouse stores, think creatively. When you realize that you can put a plant in almost anything that holds dirt and has some sort of drainage system, the possibilities for inexpensive container gardening grow exponentially.


Start by deciding if you need the containers to be decorative as well as useful since this will influence where you start looking for ideas. If you are OK with a simple and utilitarian look, then start gathering up things like:

  • Plastic Buckets – Any size will work. The only thing you need to do is to punch some holes in the bottom or sides (if that is easier). Black buckets will hold the heat more which is great for northern gardens, but might not be recommended for warmer climates.
  • Old Tires – I love using these to put my rhubarb plants in. I keep stacking tires on them as the stalks get longer forcing them up to the light. Again, the black tends to hold heat and act like a greenhouse of sorts for my plants.
  • Rolls of Wire Fencing – Simply make a tube, wire shut, cut to the height you want and then fill with dirt & mulch. This is a wonderful way to grow potatoes and if you keep covering up the plant, your veggies will be above ground when it’s time to harvest, eliminating the digging.


Now, if you’re looking to add some interest to your garden or things that are a tad more decorative than an old tire, start by using your imagination. I’ve included some pictures of things I’ve used in my garden that aren’t typical “planters,” but work as such. My easy to implement rule is if I can get some dirt into it, it’s a planter!

If you are not sure what might be planter possibilities you’d like to add to your garden, begin by walking around your property or digging around in the garage or shed. Look for old containers under your kitchen sink, even plastic dish pans would work. Broken pots can be tipped over in the dirt and used to “frame” a plant like it’s spilling out. Cracked bird baths can be given a new job with some dirt and a layer of lush Baby Tears.


Another place that can bring container inspiration are local thrift shops and neighborhood garage sales. You can find countless treasures in these places and many of the items I’ve found when searching there have now found a home in my garden. Remember, if it holds dirt, it’s a planter!


A tradition began in my garden when one of my kids moved out, leaving her old gardening shoes for me to dispose of. She mentioned, “You could always plant in them” and that7s exactly what I did. Her shoes were such a hit, we then required kids that were leaving, to donate a pair of shoes to the gardens (since I have taken care of foster kids over the years, needless to say, there are lots of shoes scattered around the property).

My favorite has to be my dad’s last pair of work boots which my mom brought to my gardens after dad died. They are planted with forget-me-nots and located at my front door.


Frugal Gardening

When it comes to your garden, you need more than just plants to keep it alive. You also need the tools to keep the garden healthy and vibrant. To take care of your garden you also need to keep your tools safe. To do that you should get a shed from Capital Construction to keep all of your tools safe from the weather. I could survive with the first five tools if I needed to be really frugal, but I expanded my list to include the last five that most people would find essential:

Shovel: You’ll need a shovel and a regular round end shovel is the choice if you can only have one. There are other varieties, but a generic round end will work for most tasks: moving dirt, digging holes for new plants and dividing large plants to name just a few. There is a lot of dirt that needs to be moved when you have a garden making the shovel the number on tool on the list.

Hoe: Again, there are many different kinds of hoes to choose from and if you can only get one, opt for a basic model. While there are lots of the fancy kinds of hoes, anything with moving parts doesn’t belong on a “have to have” list. My favorite is a forked hoe. This seems to be the easiest to maneuver in and around existing plants in my opinion.

Bucket: You don’t need anything fancy here, but you do need a bucket. A free plastic bucket will work fine for steeping compost “tea”, mixing potting soil, soaking the roots of a free plant – the list of uses are almost as long as my favorite plant list!

Hose: You will need to get water to whatever you plant and that will determine the length or number of hoses you need. This is one area where it can be worthwhile to pay a bit more for a quality hose since I have found the cheaper ones I have had over the years just didn’t pass muster. You want a hose that doesn’t kink up and one that will “behave” when it’s coiled up.

Spade & Cultivator: If you are planning on any container gardening, a hand held spade and a cultivator (or something similar) are a necessity. You could substitute these with kitchen type serving utensils like large serving spoons and a fork found at a thrift store if you’re in a big pinch. You’ll probably need to bend the handles to make them function as garden tools, but they will do the job.

Those are the essential tools you’ll need. The next 5 you could probably get by with if it was absolutely necessary, but these are still well worth the investment if given a choice:

Wheelbarrow: A wheelbarrow comes in extremely handy to haul compost, trimmings, soil, etc. You could substitute a wheelbarrow with a tarp which might be cheaper to begin with, but it will wear out with repeated use. You could also use a free 5 gallon bucket if you are working in a small yard, patio or deck area.

Watering Can: This device is especially nice when mixing fertilizers and other such things so you can place the mixture exactly where you want it. Buckets work, but it’s hard to regulate how much you’re pouring that way.

Markers: If you want to know what you have planted and where it is, you’ll need to mark where you planted everything. There are many plant/row markers are on the market, but the most frugal ones I’ve come across are plastic knives. A big box of these are fairly inexpensive, and if you’re really frugal, collect them from the next potluck you attend. They can last a couple seasons at a minimum and much longer if you’re careful. They come with a nice flat surface to write on, the rain won’t hurt them and you’re not out a ton of money if they get lost in the garden or accidentally they end up in the compost pile.

Garden Stakes: You can buy these at any garden center or you can be creative and come up with frugal alternatives. I have several sizes, small (18″) to large (5′). They are convenient to mark rows or individual plants, stake up plants that require support or you can use several in a row to string twine between, creating a support for plants like sweet peas.

A Tarp: I know I mentioned this as a substitute for the wheelbarrow, but it has enough uses in a garden that I thought it deserved its own number. I’ll use it if I’m digging a hole to plant a large bush or tree so that the dirt that comes out of the hole is not put on the lawn or on top of other plants in the garden. It’s also a great way to move a large bush or tree once you get it dug up. Spreading a tarp out on a picnic table would make a great temporary planting area and it helps keep the mess contained.

Happy Gardening, no matter what size & scope your corner of the world is.


Vinegar Uses In Garden

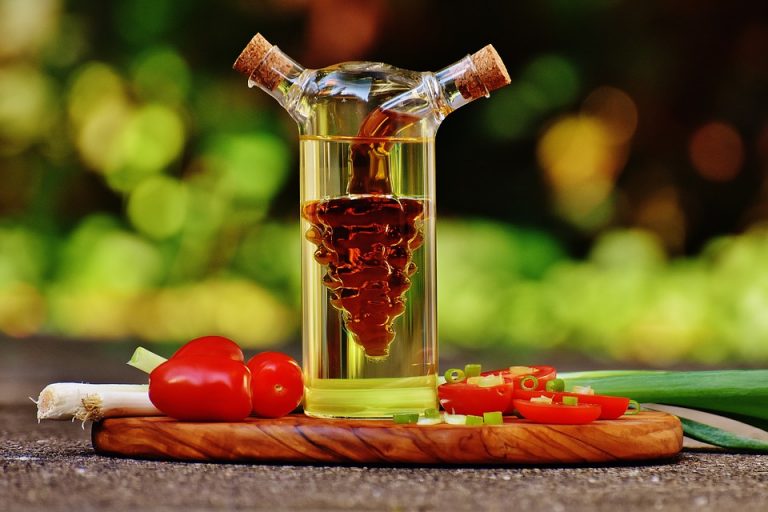
1. Clay Pot Cleaning: Vinegar will remove the white salt buildup on old clay pots. Simply soak the affected areas in full strength vinegar.

2. Kill Grass: Undiluted vinegar will kill grass between bricks and sidewalk cracks. Simply spray where needed.

3. Kill Weeds: Spraying full strength vinegar on weeds will kill them – be careful not to spray it on the surrounding grass as it will kill that too.


4. Deter Ants: Spray vinegar around doors, appliances, and along other areas where ants are known to gather and the vinegar will keep them away.

5. Keep Cats Away: Vinegar will help keep cats away from areas you don’t want them. Sprinkle vinegar on any areas where you don’t want the cat walking, sleeping, or scratching.

6. Freshen Cut Flowers: Vinegar will help fresh cut flowers last longer. Add 2 tablespoons of vinegar and 1 teaspoon sugar for each quart of water.

Courtesy of Treva


Shrubs From A Pile Of Sticks

From this pathetic little bunch of twigs, given a few years, I will have a couple of nice rows of hydrangeas. I grabbed the handful of trimmings out of the compost pile when helping my mom in her yard this spring.

The second photo shows the same bunch, this time prepared into ready to plant “cuttings”. I don’t profess to be an authority on this subject, but I sure have come up with a yard full of free plants using my method.

I start by looking at the branch I have rescued, and determining where the buds are forming, or where the leaves are located. I cut on the diagonal and try to make it so each “cutting” has one of the bud intersections for the root and one above ground for the beginning of my new plant.

If I’m working with a branch that has large leaves, I cut the 2 leaves that will be above ground in half, so the little start doesn’t have to work so hard on leaves, but it can concentrate on putting out some new roots.

In the past, I have gone to the trouble (& expense) of trying a rooting hormone to dip the ends in, but haven’t noticed any difference in my starts. Both end up with a nice plant; one for free and one using a fairly expensive product. No guesswork needed as to which method I prefer!

The last photo shows one of my new starts in the ground – they were there less than a week at the time of the picture. New leaves are beginning to unfurl which is a promise of a new garden addition (you must remember that “free” gardening often requires patience as the reward does not come as quickly this way as with buying plants that are already mature).

I have used this technique on many woody, branch type shrubs and plants such as forsythia, laurel, etc. If the method is free, what have you got to lose?


Free From Landscape Firms

A phone book and your local newspaper can be great tools to get your garden going and growing this spring. No, you’re not going to shred them & use them for mulch (although, this is not a bad idea).

What you want to do is look up the landscape firms in your local area. Make an effort to contact as many as you can until you come up with at least one willing to “work” with you. And, no, you’re not going to pay them to work in your yard.

Landscape firms have a problem that you can help them solve. In their work, they have a lot of yard waste and plants to dispose of and they are usually forced to pay fees in order to get rid of these items. If given the choice, most would rather give the “waste” away for free than to pay fees to have it hauled away. This is where you come in.

All you do is contact the landscape firms and see if they have items that you need that they need to get rid of. What is their “waste” may be exactly what you are looking to use in your garden. By taking the time to find them and to introduce yourself (and your garden), you can come to their aide.

If you are looking for specific garden items, you can ask for specifics. An easier way may be to just come right out and ask if they have anything they are paying to get rid of. Either way, you stand to gain “goodies” for your garden and they stand to save some dump fees. Most landscape firms have the following items after finishing a job:

  • Mulch, especially if you live in an area where lawns are being mowed. Just think of all that fresh grass mulching away in your garden beds, or between the rows of your veggies. If you’ve got room for the company’s truck to come in and dump a large pile, and you don’t live on the other side of no where, this might be a win-win situation for you and the landscapers.
  • Cuttings. Again, this depends on your area and time of year, but think of all the plants that are being cut back, pruned and trimmed back. With a little work and a couple years worth of patience, you will see new shrubs and trees for your effort.
  • Plants. Most commercial accounts pay for their landscape company to switch out their plant displays regularly. Where better for the old plants to find a new home than your garden?

Be warned, you’ll more than likely receive a number of “no thanks,” “we already donate to someone else” or “that would be too much work.” Don’t be discouraged. You can explain how you are willing to come to them to pick through the old plants, grab the cuttings before they hit the dumpster or bring trash cans for them to fill with grass clippings. The easier you make it for them, the more likely that they will let you help yourself to their waste. If they still say no, thank them for their time and move onto the next company on your list.

I’ve had a landscape company agree to dump a truckload of their trimmings in my yard with no extra work for them. In this case they were happy to do so because then they didn’t even have any dump fees to pay. It meant that I did have the job of digging through pile to find the items worth saving and then preparing the rest of the pile to be used as mulch, but it’s almost like Christmas uncovering an armload of hydrangea trimmings (how many plants can I get from an armload?), the equivalent of flats of bedding plants or enough ground cover starts that I can share (and trade) with all my friends.

Grab your list and get your garden growing!


Save Money – Gardening

The Earth Laughs in Flowers
– Ralph Waldo Emerson

garden flowers


Gardening can be fun, enjoyable and downright expensive if you’re not careful. This site is dedicated to bring you easy to implement gardening tips and techniques that can help you save money while keeping all your plants in tip-top shape.

Making your garden beautiful on a budget is not nearly as difficult as it may first appear. You don’t need to have the fanciest plants or the shiniest garden tool to make your garden a sight to see. It does take a bit of organization and planning, but this will result in you having a garden full of vegetables that you can place on your table at a low cost.

From keeping your gardening tools in good condition to learning how to trade seeds to get a large variety of vegetables at virtually no cost, there are a lot of ideas within these pages to help you keep your gardening and plant care needs at a minimum.

If you have your own frugal gardening tips that you’d like to share with others, please email us so that we can add your suggestions to our growing list.


Garden For Free

garden for free
Is it possible to have a lush flower garden, produce your own veggie patch or just add to the landscaping around your home all for free? Absolutely. One of the easiest ways to do this is to participate in your local chapter of Freecycle. This is a Yahoo list, available at FreeCycle.org. The organization began in 2003 and now boasts close to 3500 chapters, or communities, as they are called and over 2 million subscribers.

The goal of Freecycle is to limit adding to the landfills by recycling usable items. Posts need to be free, legal and appropriate for all ages. Freecycle: a simple solution to get rid of your no longer needed items and a fantastic way to acquire things on your wish list…all for free (minus the gas to go pick the things up!)

Once you have joined the group, please read your communities rules & regs. For example, my local group limits the number of WANTED posts you may list per month, as well as all participants are asked to list at least as many OFFERS as WANTEDS.

As soon as you’re comfortably at home on your local Freecycle list, start posting according to your groups guidelines. Begin small, as you will want to follow through on all posts you receive (in order to be a responsible list member). How about:

WANTED: Strawberry starts/ Lake Stevens

I’ll be happy to take your extra plants
off your hands, now that many of you will
be thinning your strawberry patch. Please
let me know if I can assist with the digging
too, not afraid of hard work here! Thanks
much for freecycling!

Try to time your posts to the gardening tasks currently happening in your area (check our lists here or online for monthly gardening “to do” lists, or your local papers’ gardening column) Local gardeners usually hate to throw out good plants and would much rather share with others.

If you’re really new to gardening and don’t know what you want, you can post something general like:

WANTED: Outdoor plants/ Lake Stevens

I’m new to gardening. Have dirt, shovel
and ready to work. Please let me know
if you have plants, bushes, trees to
share. I would love any help you could
give to get my garden growing!

Be sure to send thank you notes to anyone you get plants from and always offer to take any other excess they may have. Strike up a friendship, tell them your interests regarding plants, offer to help in their garden with larger type chores needing a couple people, ask for advice regarding the plants they did give you and any other gardening questions you may have. Connections like these are the first steps to getting your garden to grow.

So how much did we spend on this so far? A new strawberry patch – Cost: just the gas to go pick up the plants! The same is true with the New Gardener post. You could get your vehicle full of plants for no cost at all. Remember to be flexible, be thankful and grab that shovel and get to work!